until
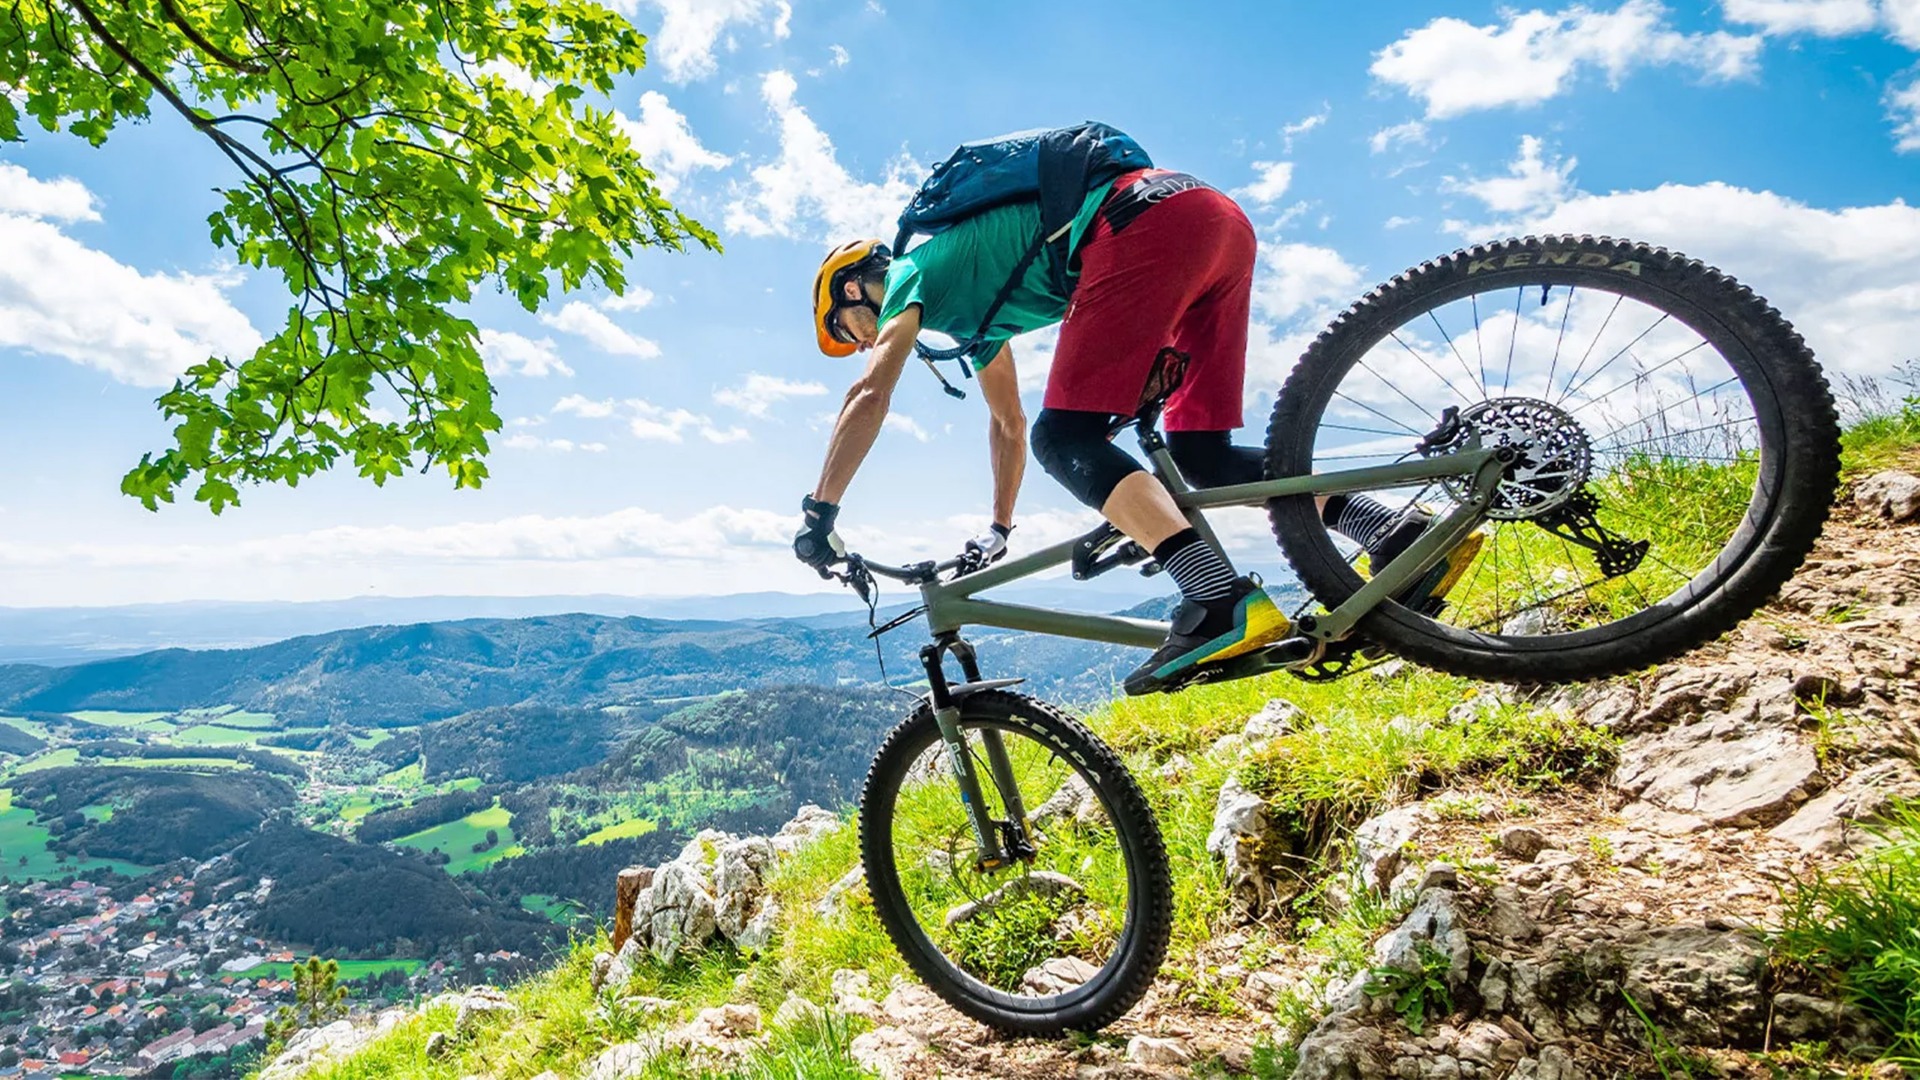
Biking must be learned!
Johannes Pistrol from the #skinfitcrew is an ambitious mountain biker and specialist on the tricky trails. You can learn a lot from him, which is why we asked him to show us and you again exactly how it actually works with the tight turns aka hairpin turns on the trails. For this reason, he explains to you here the correct technique
How do I get around tight corners on the trail?n?
Johannes | Offsetting the rear wheel is a cornering technique that is used primarily in the alpine region to master even the tightest turns with the mountain bike. As the name suggests, instead of both wheels of the bike rolling around the bend, the rear wheel is lifted and shifted to the side to continue in the other direction. The widespread use in alpine areas is no coincidence. Most trails and paths in the mountains were created for pedestrians, and they don't need such large curve radii as we bikers do.
In order to preserve nature and not destroy old trail systems, it is recommended that bikers learn how to offset the rear wheel. Mastering tricky bends while riding is also incredibly fun. Even for bikers who do not find such tight turns on their home trails, learning this cornering technique is worthwhile. In my experience, every riding technique you learn improves your control of your bike, gives you confidence and expands your scope of action in tricky situations.
Relocate rear wheel - but how?
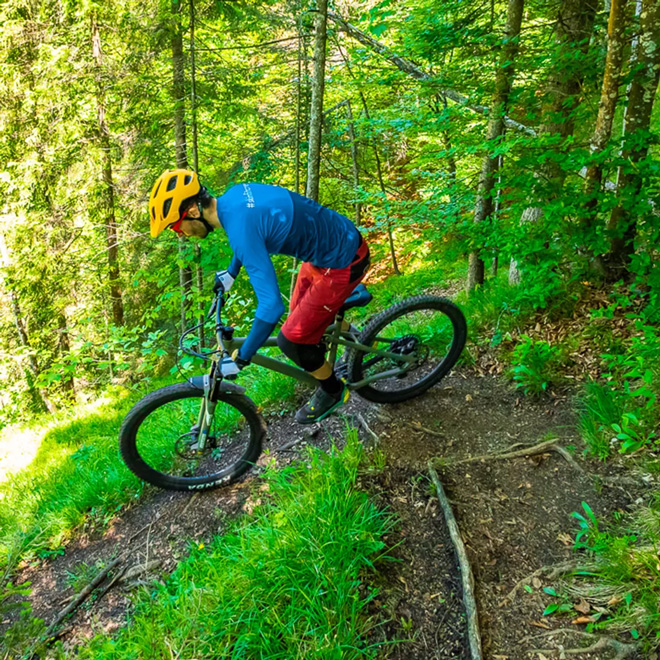
Moving the rear wheel may look simple, but in any case it is an advanced riding technique that requires some practice and especially coordination. The whole maneuver can be divided into 3 movements - lifting the rear wheel, moving it sideways and finally putting the rear wheel down and balancing the bike. You can practice the technique almost anywhere, although for the beginning a meadow with a moderate slope is best suited from my point of view. The saddle is lowered as far as possible to have plenty of clearance above the bike. To learn the technique cleanly, I recommend flat pedals instead of clipless pedals. Helmet and gloves should be a matter of course, knee and/or shin guards are also never a mistake.
1. lift rear wheel
There are two ways to get the rear wheel up - pulling the front brake and pushing off and wedging in the pedals. Both techniques will achieve the goal, with a combination working most efficiently. To practice both techniques, first roll down the practice meadow at low speed in the home position. This means standing on the pedals with the legs slightly bent and the crank in an almost horizontal position. The arms are slightly bent in order to continue to have room to move. But still stably tense, so as not to buckle over the handlebars as soon as the rear wheel lifts.
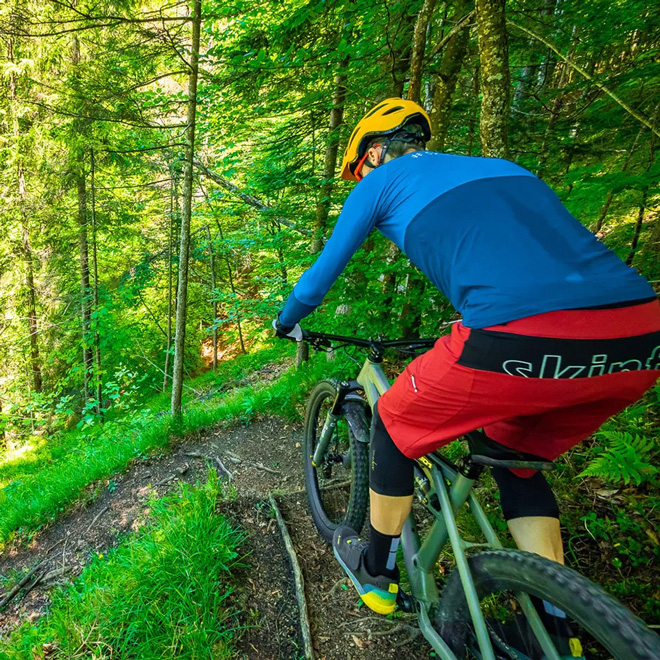
On the approach, I set the cranks horizontally, have my legs and arms bent and make sure my upper body is stable. My gaze is focused on the course of the curve.
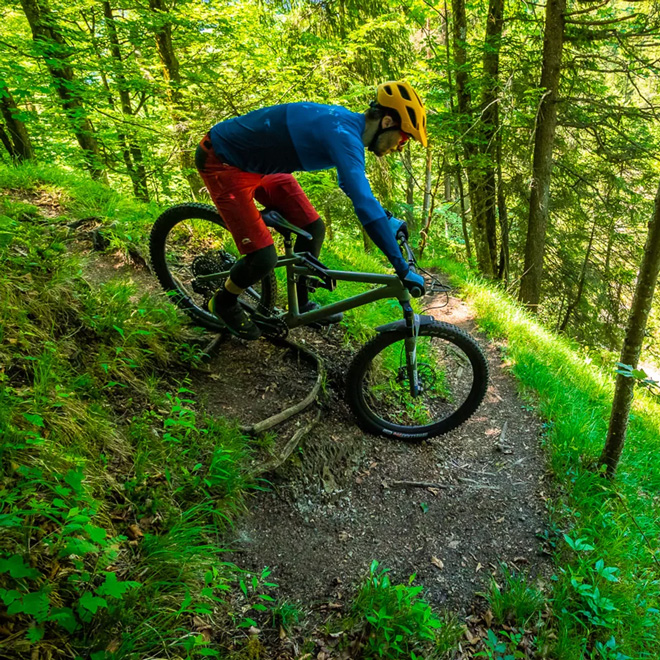
To lift the rear wheel using the front brake, let the brake drag slightly and then grip harder and harder until the front wheel stops and the rear wheel lifts. By pulling the brake more quickly or at a higher speed while rolling, you can slowly increase until you have developed a confident feeling for the dosage of the brake. It is also possible to release the rear wheel from the ground without any help from the front brake. Again rolling in the basic position, you angle your legs a little further and then push yourself off the ground dynamically via the pedals. To ensure that the bike follows the movement and you don't just hop off the bike, you have to wedge yourself into the bike and build up body tension between the points of contact with the wheel. This works via a firm grip on the handlebars and via the friction between the soles of the shoes and the pedals.

To release the rear wheel from the ground, I push off with powerful pressure on the pedals. The damper of my Fully is thereby visibly compressed.
Those who have mastered both techniques can also combine them in the next step. The dynamic push-off provides more control over the rear wheel and the amount of lift. The front brake ensures that the front wheel actually locks in tight turns and that the shifting of the rear wheel also succeeds at the required point.
2. lateral displacement
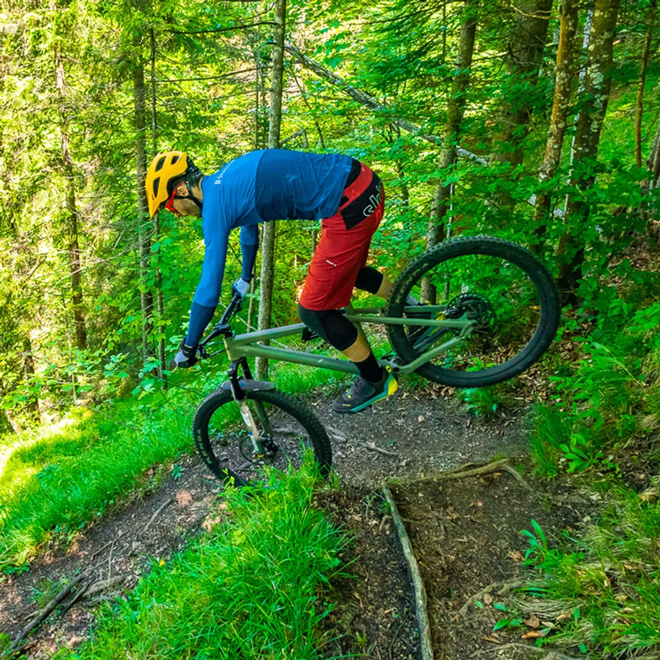
To ensure that the rear wheel does not simply fall back to the ground at the same point after being lifted, the lifting process is initiated by a short steering movement. For a left-hand bend, for example, you turn left shortly before the apex of the bend and lift the rear wheel while turning. The steering impulse ensures that the rear wheel automatically swings toward the outside of the curve. A major challenge is the correct timing, i.e. the temporal coordination of the steering movement and the lifting of the rear wheel. Practice makes perfect here, too. To increase the lateral movement, you don't just push straight up off the ground, but pull the wheel along with you by moving your hips in the direction of the outside of the curve. It is essential to maintain body tension and wedge yourself to the wheel.
After the dynamic push-off from the ground, my hips immediately go towards the outside of the curve with the handlebars slightly turned in, in order to turn the rear wheel further.
3. setting down the rear wheel
The third part of the maneuver is hardly understood as an independent step, but for many it represents a great challenge. Although the rear wheel also comes back to the ground on its own, it is all too easy to lose balance in the process. One of the reasons is the lack of driving speed, which normally has a stabilizing effect. Therefore, as soon as the rear wheel has been displaced far enough, you should immediately release the front brake to roll forward and regain your balance. Sloping terrain, such as the aforementioned practice meadow or a path with an incline, helps immensely.
My rear wheel has already covered a sufficiently large distance to be able to continue safely on the trail. I therefore release the front brake to stabilize my bike by moving it.
When the rear wheel finally regains contact with the ground, I've already rolled a bit along the trail.
Especially when learning to shift the rear wheel, you often want too much and try with all your might to bring about a sideways movement of the rear wheel. Often there is then too much momentum left in one direction when the rear wheel touches the ground again. This means that the lifting of the rear wheel and the lateral displacement must be coordinated. The higher the wheel is lifted, the further it can be displaced laterally. At the beginning, it is therefore advisable to rather concentrate on lifting the rear wheel cleanly and not to give too much impulse in one direction at first.
Transfer technique on the trail
The cornering technique is clearly not practiced for the green meadow, but for use on the trail. I have a few tips for this: For ordinary cornering, the following applies to almost all vehicles: outside-inside-outside. However, if you offset the rear wheel of your bike, other factors play an important role. I always look for the best place to put my front wheel in a tight turn. In the short term, the front wheel is my only contact with the ground. I have to be able to rely on the front tire having good grip and not slipping away. A flat surface, without roots or loose rocks is ideal. In the photo section, for example, there is a root and a small step just before the apex of the bend. I therefore still roll over this root step to place my front wheel immediately behind it for the offset.

A place where the front wheel has a good grip often dictates the line choice when moving the rear wheel.
The rear wheel must have enough space to be moved laterally. Sounds and is logical, but nevertheless you must first develop a feeling for how long your own bike is and how much space it needs when moving the rear wheel. The ideal point in the turn for offsetting can also be influenced by that. You don't have to tackle every turn with a single offset. It is often better to master a turn in several stages and safely offset the rear wheel in two or three steps than to lose balance with one over-motivated move.
I hope this post helps you learn the transfer technique!
Have fun practicing,
Johannes
